
I have a huge obsession for the peripheral and abnormal props and scenery that you see in video games. I have always wanted a lawgiver or the mask from the old Shinobi games. One thing in particular that I really wanted was one of the eggs from Super Mario Brothers.


As luck would have it there were none that I felt would do the game justice so I decided it was time to act. I ran to my cave and grabbed one of my left over chunks of foam. It literally took me ten minutes to carve and sand the bead foam to a relative shape. Logically the next question is; what to make it out of? Then it hit me; I could cast them in bead foam so that they would be squishy and you could launch them at your friends without causing a major head injury....well not intentionally anyway. However there was a flaw with this theory in the fact that I would have to find a way to make this egg as organic as possible because I wanted it to look "real" (aside; yes I know its from a game thus fictional but I can dream can't I?!!!) This meant that I would have to glass the foam first but fiberglass resin eats bead foam. Dammit! Then it hit me.
 That's right, paper mache! I wasn't about to risk having to copy the egg again because cleaning up bead foam is a pain in the ass. I surmised that if I covered the egg in paper mache and then covered that in glue ; I would stand a better chance of having a complete egg as opposed to a gooey chemical mess on my shop table.
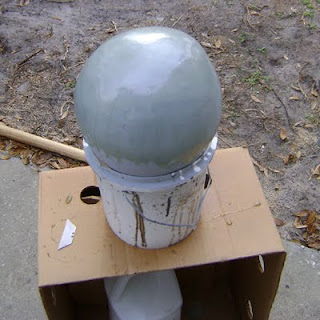 Above you can see that I used no mat for this process. I needed it to be smooth, not double as a Howitzer round. I painted three coats of glass onto the egg and primed them using simple automotive primer. Once the glass was dry I sanded it smooth and re-glassed thin spots. then re-primed it and painted it again.
 Once I was satisfied that it was mostly smooth I used auto-body filler to fill in small imperfections. This is because Silicon, at least the stuff I use, will pickup detail as small as a fingerprint. So, once it was satisfactorily smooth I went to the next phase which was.......
 Molding time! Above you can see the key and zipper system I use. I was running short on Klean Klay so I just did one row of each. Next it was time to mold this puppy and for that I always use mold max 30 from reynolds. It has an awesome pot life and the detail is amazing!

 I coated the egg with three coats of silicon per side. In hindsight I wish I had done more but my mold still works. Currently I am working the kinks out of my process and I have begun casting eggs. That's a story for next week though......To be continued!
 That's right, paper mache! I wasn't about to risk having to copy the egg again because cleaning up bead foam is a pain in the ass. I surmised that if I covered the egg in paper mache and then covered that in glue ; I would stand a better chance of having a complete egg as opposed to a gooey chemical mess on my shop table.
 Above you can see that I used no mat for this process. I needed it to be smooth, not double as a Howitzer round. I painted three coats of glass onto the egg and primed them using simple automotive primer. Once the glass was dry I sanded it smooth and re-glassed thin spots. then re-primed it and painted it again.
 Once I was satisfied that it was mostly smooth I used auto-body filler to fill in small imperfections. This is because Silicon, at least the stuff I use, will pickup detail as small as a fingerprint. So, once it was satisfactorily smooth I went to the next phase which was.......
 Molding time! Above you can see the key and zipper system I use. I was running short on Klean Klay so I just did one row of each. Next it was time to mold this puppy and for that I always use mold max 30 from reynolds. It has an awesome pot life and the detail is amazing!
 I coated the egg with three coats of silicon per side. In hindsight I wish I had done more but my mold still works. Currently I am working the kinks out of my process and I have begun casting eggs. That's a story for next week though......To be continued!


No comments:
Post a Comment